Last Updated / Reviewed: 02/02/2024
Execution Time: A few days to a couple of weeks (Google may take a few weeks to process the changes)

Goal: To optimize shopping ads through Google Merchant Center and Google Ads.
Ideal Outcome: You successfully optimized your shopping ads with improved performance outcomes.
Prerequisites or requirements:
You will need a Google Merchant Center linked to your Google Ads account before optimizing a shopping ad. For other setups, please refer directly to Environmental setups.
Why this is important: The easier you make it for Google to ‘read’ the information about your products, the better chance you have of showing up for the right customers. This will increase your sales and help you avoid wasting your money on products that don’t perform well.
Where this is done: In Google Merchant Center and Google Ads.
When this is done: When the performance outcome of your previously created ad campaign needs improvement.
Who does this: The business owner/manager or the local/agency digital marketer.
Environmental setup
[MUST-HAVES]
- If you are new to Google Merchant Center, you may refer to SOP 213 (web version): How to set up Google Merchant Center.
- If you are new to Google Ads, you may refer to SOP 014 (web version): Creating a Google Ads account.
- To link the two accounts together, please visit SOP 219 (web version): How to link Google Merchant Center to Google Ads account.
- You will also need to set up a data feed for your products. Refer to SOP 218 (web version): How to set up Google shopping data feed will help you expedite the process.
- By now, you should already have a shopping ad set up. If not, you can follow SOP 216 (web version): How to set up Performance Max for google shopping.
[OPTIONAL]
- To expedite the progress in optimizing your campaign, you may create an account with datafeedwatch.com . Add your shop with these instructions here. Next, link it to your Google Merchant Center via a File Transfer Protocol (FTP) account. Follow here for further instructions. They offer a 15-day free trial to A/B test your products. To optimize your product feed, here is an example video.
- Use Google shopping ads extensions. Depending on your campaign objectives, you may refer to a guide here.
A/B test your product feed in Merchant Center
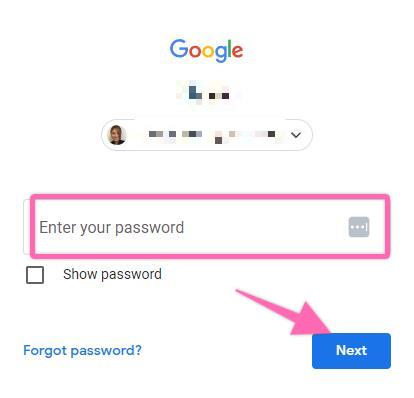
- Sign in to your Google Merchant Center account here. Choose the appropriate Gmail account and log in with your password. Click “Next”.
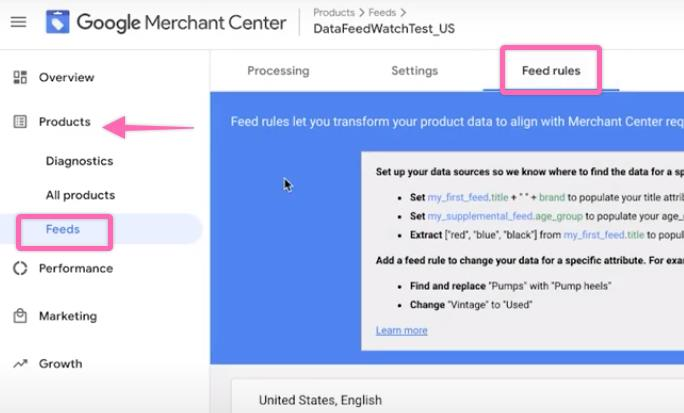
- Click “Feeds” under “Products” and click “Feed rules” to optimize and A/B test your product attributes.
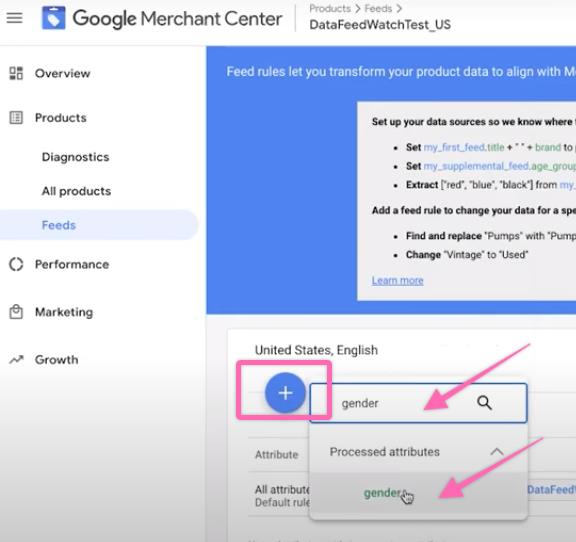
- Click on the plus button and search for processed attributes such as gender in this case.
- Next, click “Conditions” and enter a rule that contains two variables. Under a gender attribute, key in a processed attribute that you would like to look. In this case, we will look for a title or product title, which contains women.
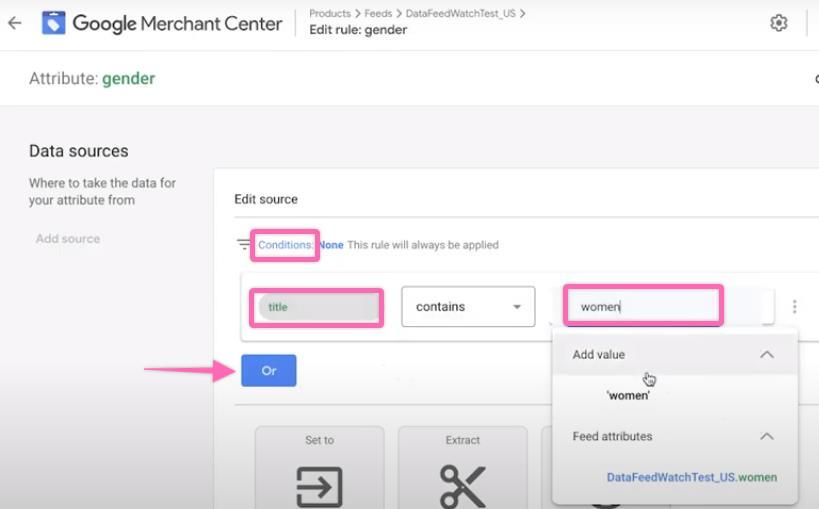
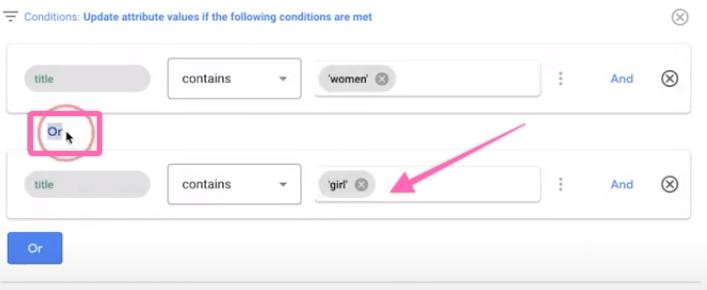
- Since we have added women to our value, we could also click “Or” to add “girl”
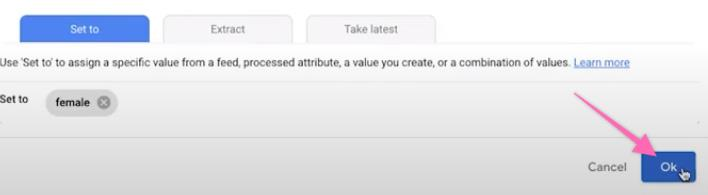
- Next, scroll down and click on the box “Type or select” followed by “Add value”.
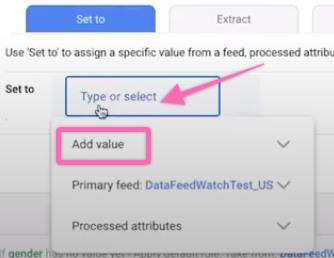
- Under “Add value”, select “female” in this case.
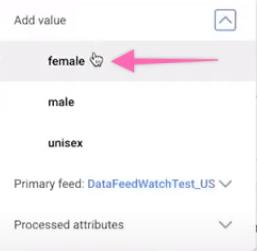
- Click “Ok”. This means that the product feed containing the product title “women” is set to “female” instead.
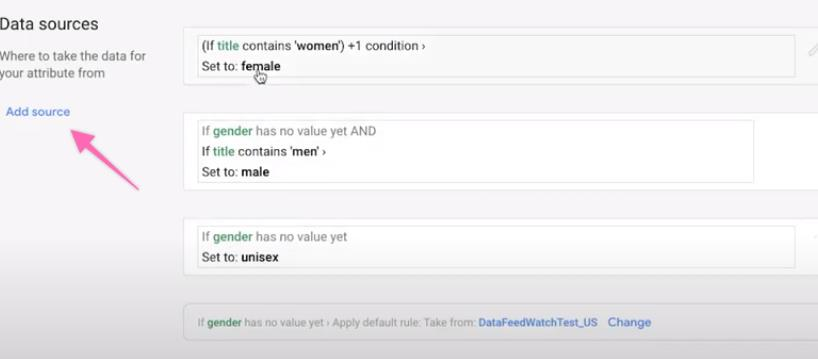
- Click “Add source” to adjust another product title under the gender attribute. You should be able to see a list of your newly created feed rules on the right.
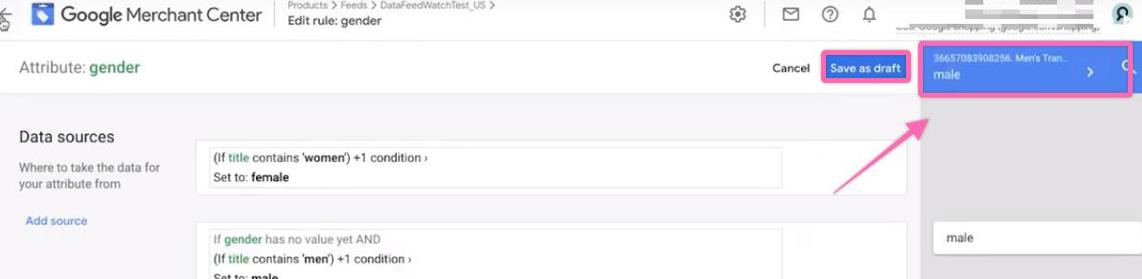
- To ensure that the feed rule works, go to your right corner arrow and click to refresh. The add value word should appear. Click “Save as draft”.
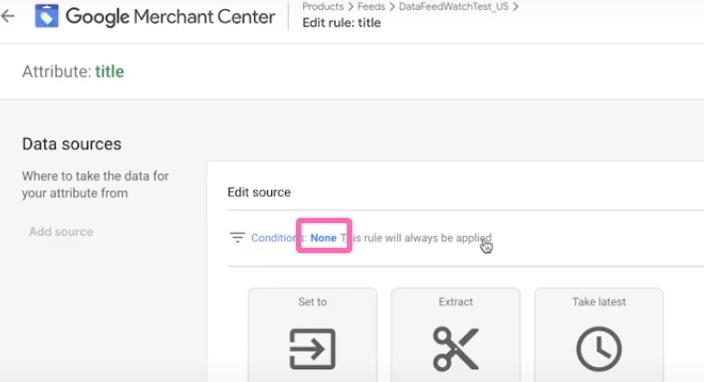
- To “Add Modifications”, make sure that your condition is set to “None”.
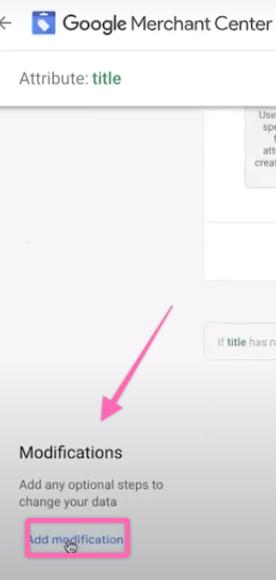
-
- Scroll down and click “Add Modifications”.
-
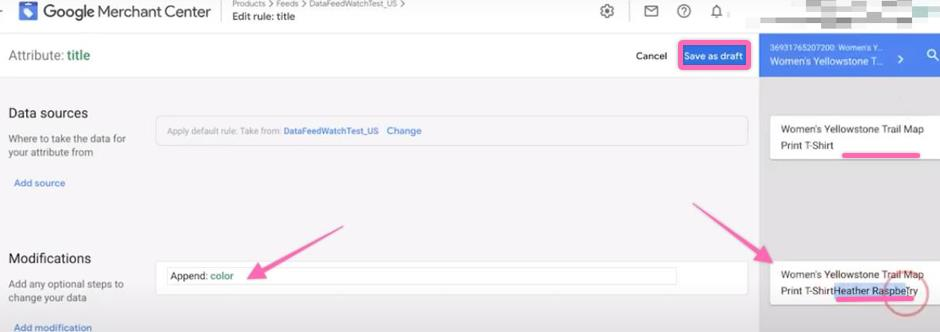
- Use a modification operation such as “Prepend”, “Append”, Find & Replace”, or “Advanced operations”. A list of modification operations and explanation can be found here. Select “Append” and click “Processed attributes”.
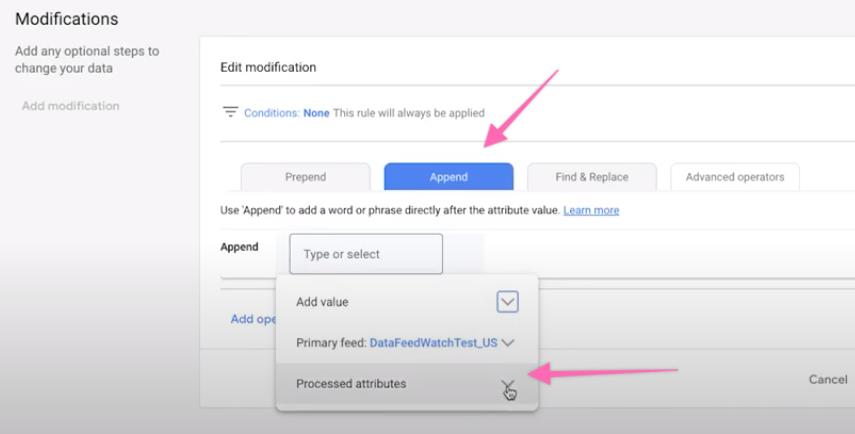
-
- Next, select a modification or in this case an “Append” type or “color”.
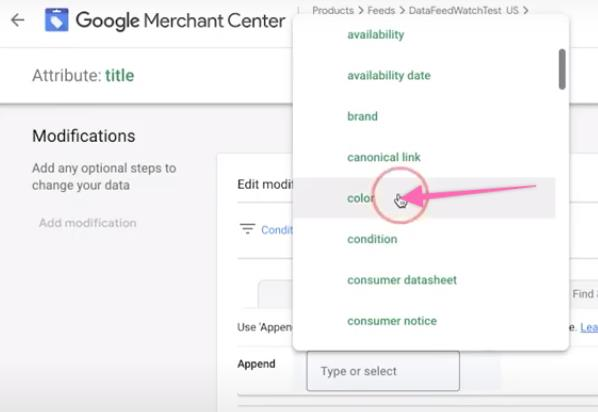
-
- Next, click “Ok”.
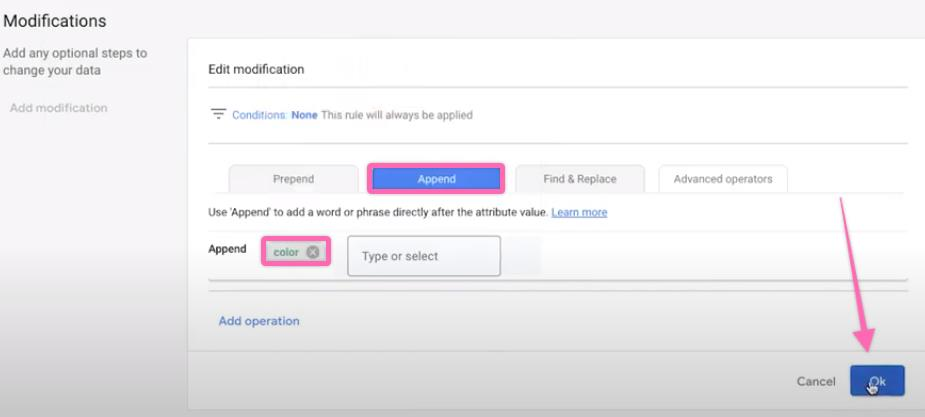
-
- Next, ensure that the feed rule is working properly by clicking on the box on your right. It should refresh and include the color text to your product title. Click “Save as draft”.
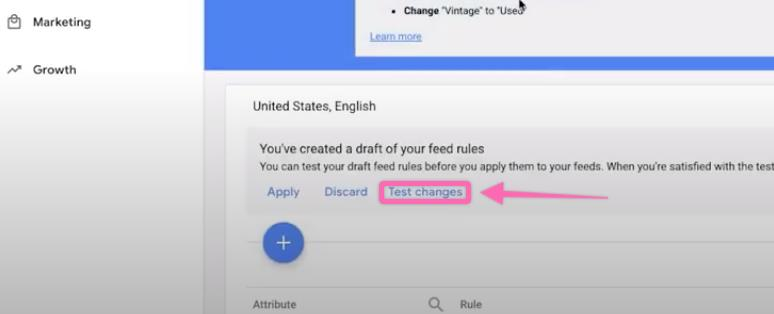
- Finally, go back to the “Feed” main page where you will see the plus button and click “Test changes”. Wait for 20-30 minutes to create the final report.
-
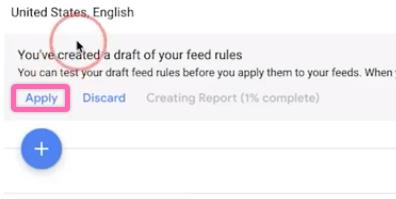
- Once the final report is deemed complete, click “Apply”. This may take up to 1-2 hours.
-
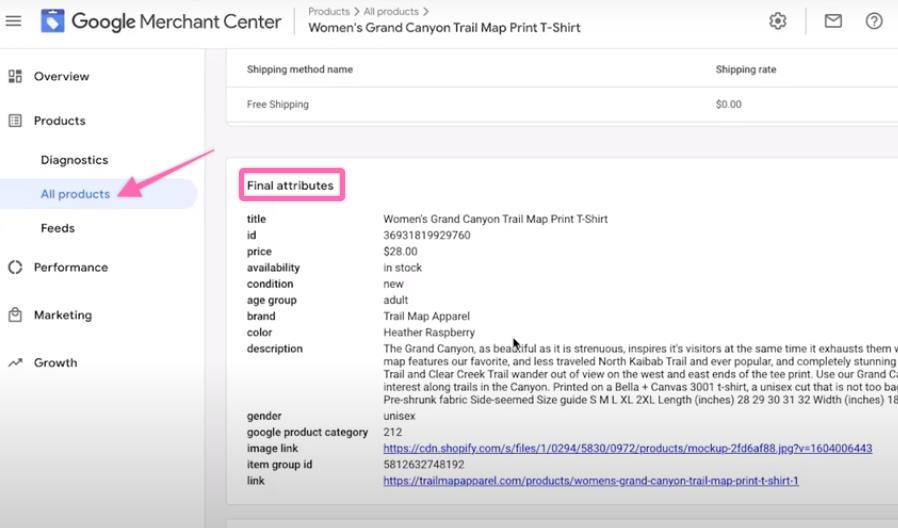
- Go to “Products” > “All products”. Click on a selected product you want to change the product title and check the changes on the “Final attributes”.
- Follow the steps above to optimize other attributes. The table below includes all basic types of product attributes. It is recommended to follow Google’s formats or minimum requirements for it to process and approve any changes to your product in your Google Merchant Center.
| No. | Product Attribute | Reference |
| 1. | Id | Product Attributes Format and Minimum Requirements |
| 2. | Title | |
| 3. | Description | |
| 4. | Link | |
| 5. | Image_Link | |
| 6. | Price | |
| 7. | Condition | |
| 8. | Availability | |
| 9. | Brand | |
| 10 | GTIN |
Upload products rating & reviews in Merchant Center
- Sign in to your Google Merchant Center account here. Choose the appropriate Gmail account and log in with your password. Click “Next”.
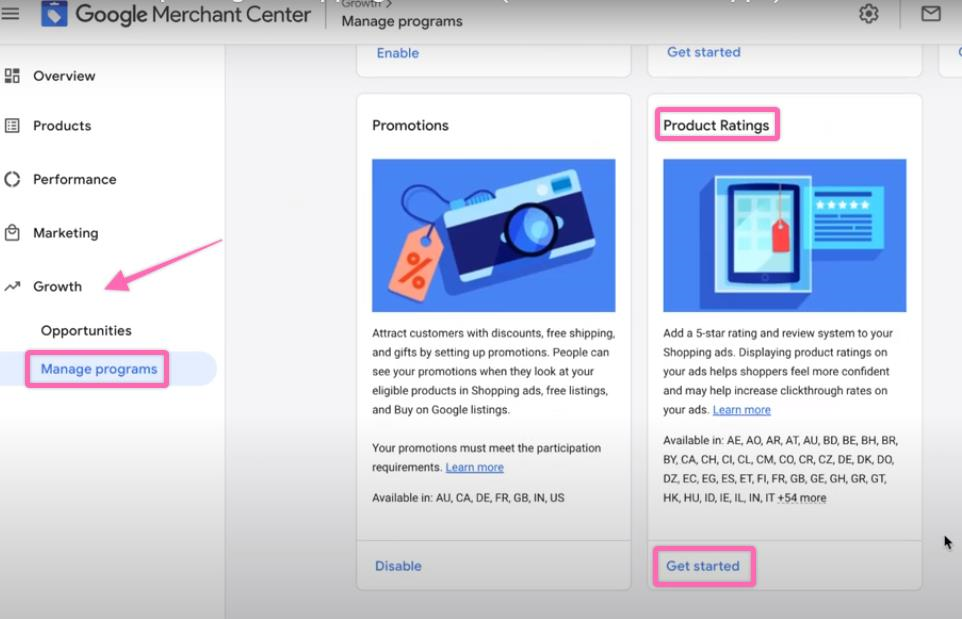
- If you are new to adding product ratings, go to “Growth” and click “Manage programs”. Select “Product Ratings” and “Get started”.
-
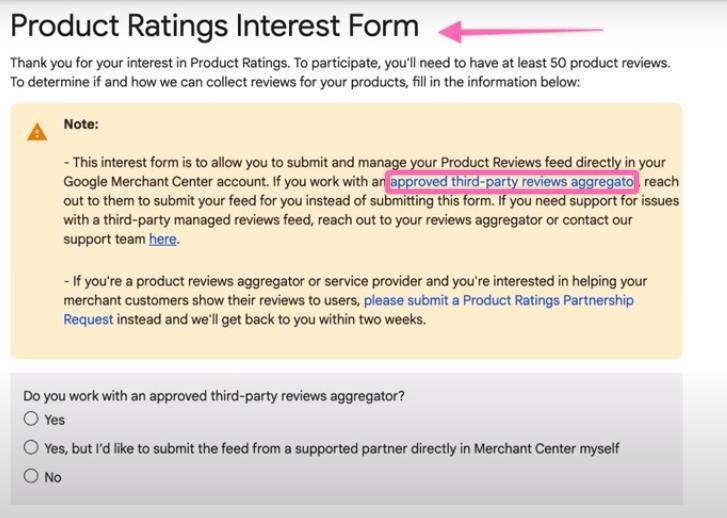
- Fill out the “Products rating interest form”. You will need to create reviews with an approved third-party reviews aggregator before adding product ratings to your Google Merchant Center. Click the e-link “approved third-party reviews aggregator” to review the list.
-
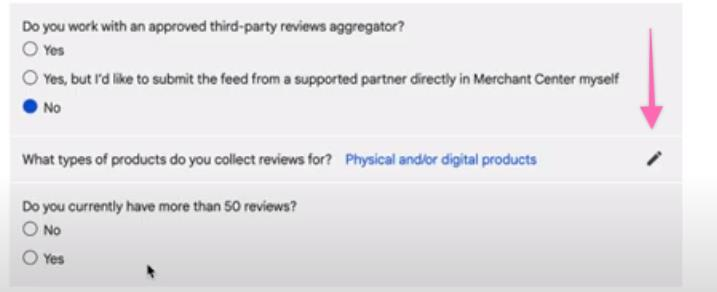
- Proceed to fill out the form by clicking on the pencil icon for each section as shown below.
-
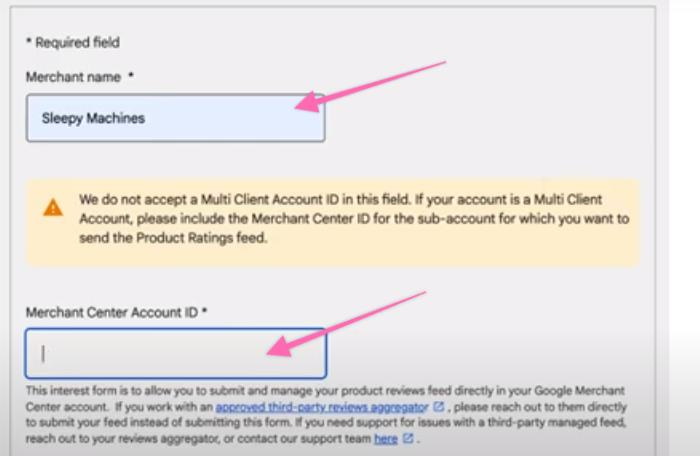
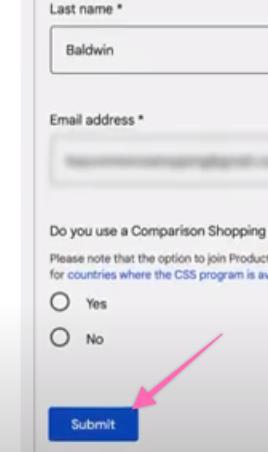
- Fill out your merchant’s name and ID. The ID can be found in the top right corner just above your e-mail address.

-
- Click “Submit”.
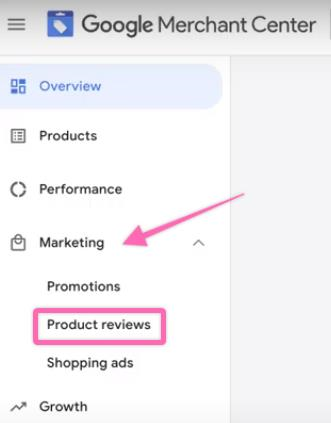
- Next, go to “Marketing” and click “Product reviews”. If you have not submitted the form above, you will not be able to see “Product reviews”.
-
- Click “Product reviews feeds” in your top right corner.

-
- Click on the plus button.

-
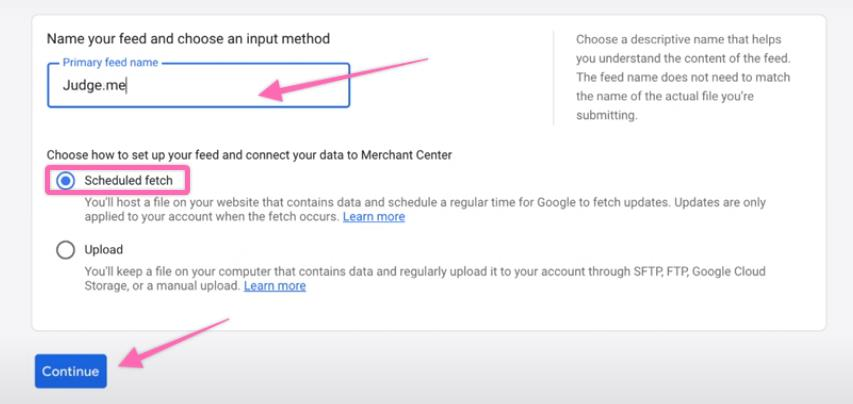
- Key in your name and select “Scheduled fetch” as an input method. Click “Continue”.
-
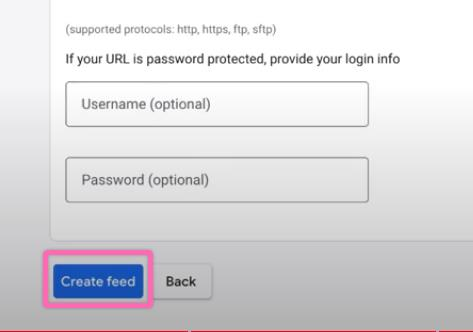
- Fill out your file name, fetch frequency, fetch time, time zone, and file URL. For automation purposes, you can create product reviews via stamped.io.com, yotpo.com, or judge.me. They will collect all reviews from your store and provide a file URL.

-
- Click “Create feed”. It may take ~2-4 weeks for Google to manually process the reviews and upload them to your store.
Add the right negative keywords in your Google Ads
- Sign in to your Google Ads account here.
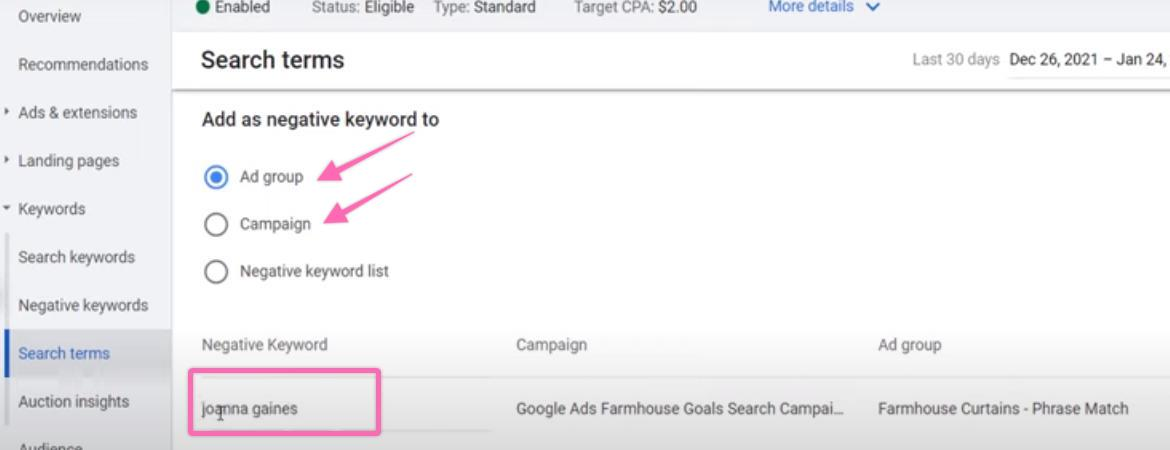
- Go to “Search terms” and click on a preferred search term followed by “Add as negative keyword”.

-
- For new users, you may refer to Types of negative keywords and SOP 147 (web version): Perform Keyword Research for Google Ads.
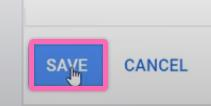
- You may choose to add a negative keyword to either “Ad group” or “Campaign”. Enter a negative keyword below. Hit “Save”.
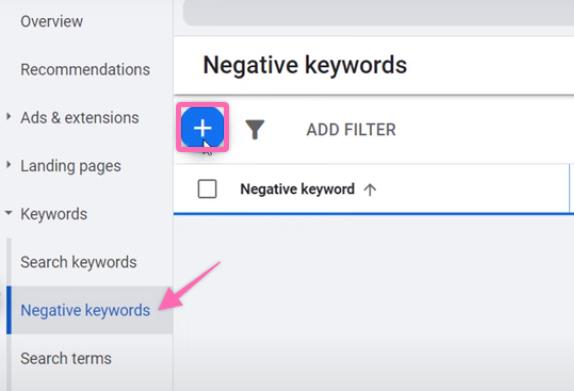
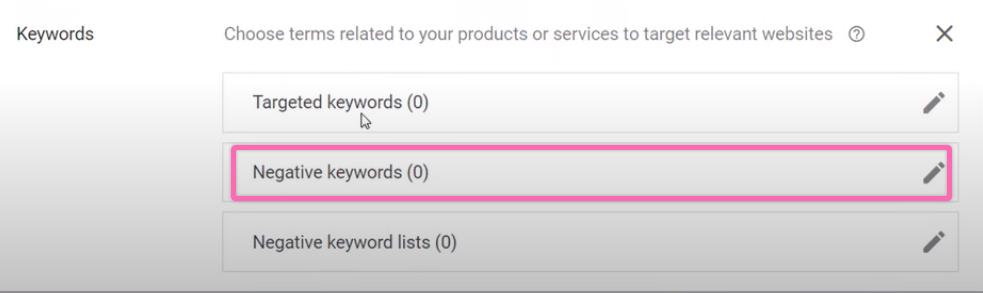
- Alternatively, you can go directly to “Negative keywords” on the left navigation menu and click the plus button to create a new list.
-
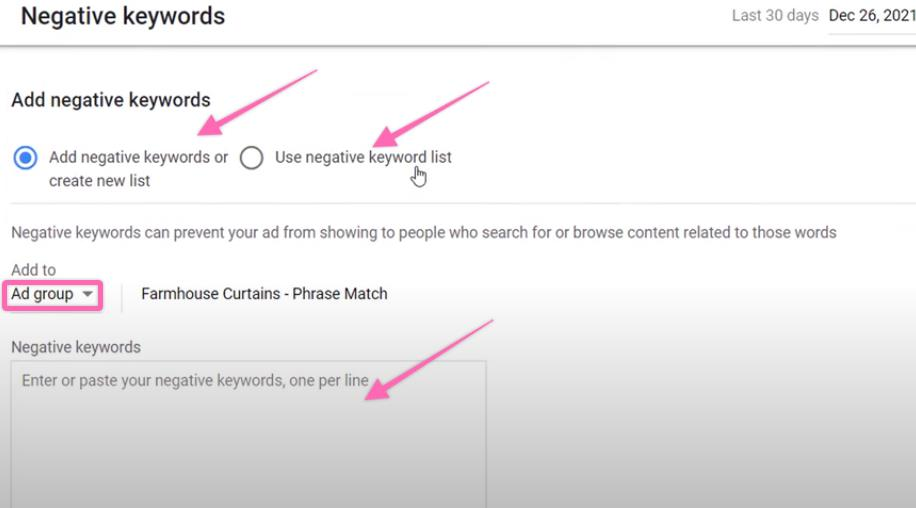
- Click “Add negative keywords or create new list” and add to either “Ad group” or “Campaign” in the drop-down menu. Enter your list of keywords (one per line). Click “Save”.
-
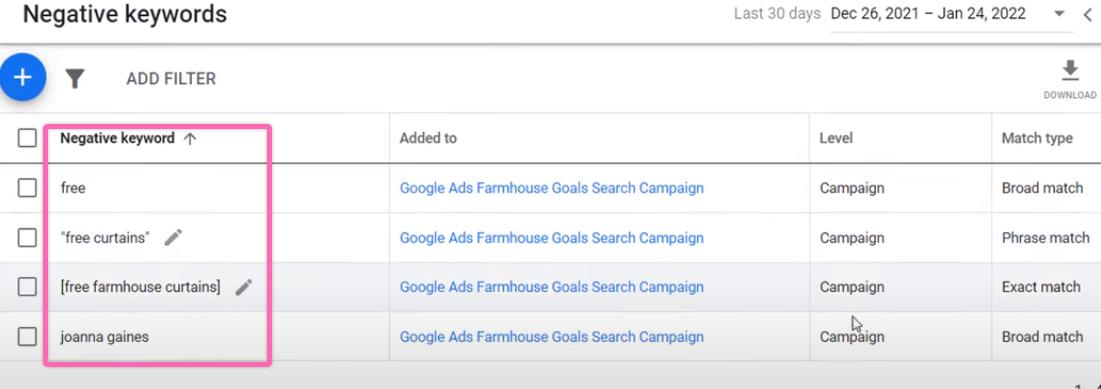
- By now, you should be able to see a list of newly created negative keywords as shown below.
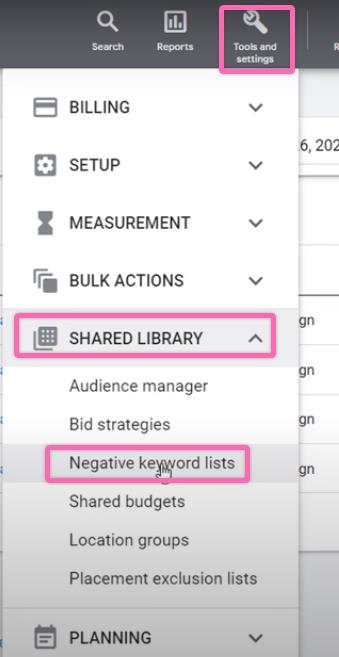
- To add a negative keyword list, go to the gear icon on your top right and select “SHARED LIBRARY” > “Negative keyword lists”.
-
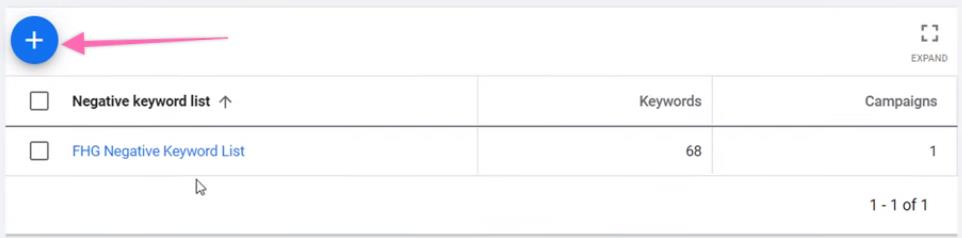
- Click on the plus button
-
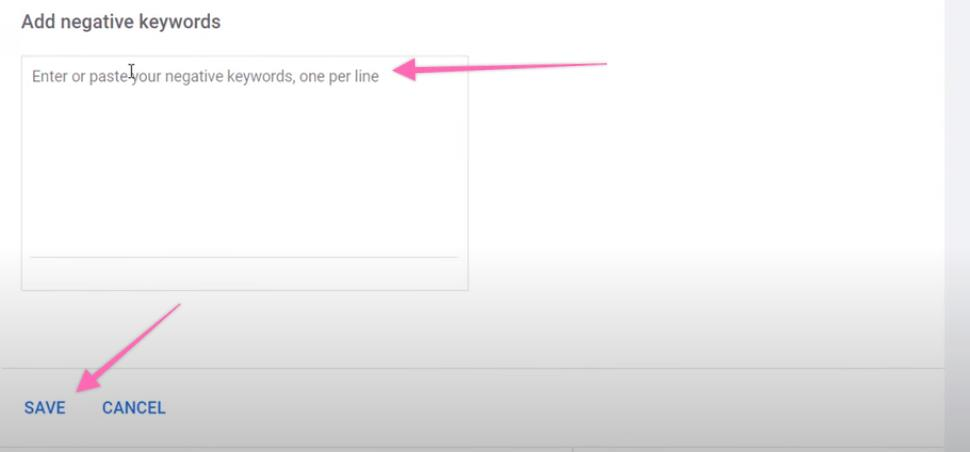
- Key in your negative keywords and hit “Save”.
-
- Check the box including the negative keyword list and hit “Apply to campaigns”.
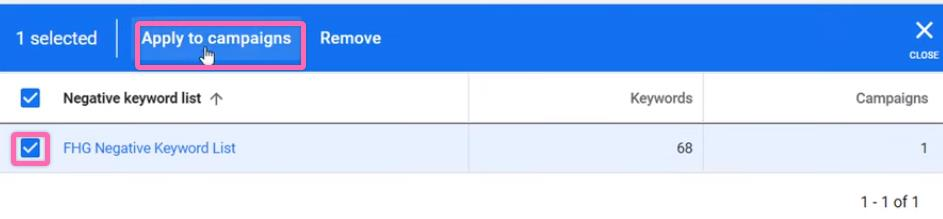
-
- Search for your campaign and hit “Apply”.

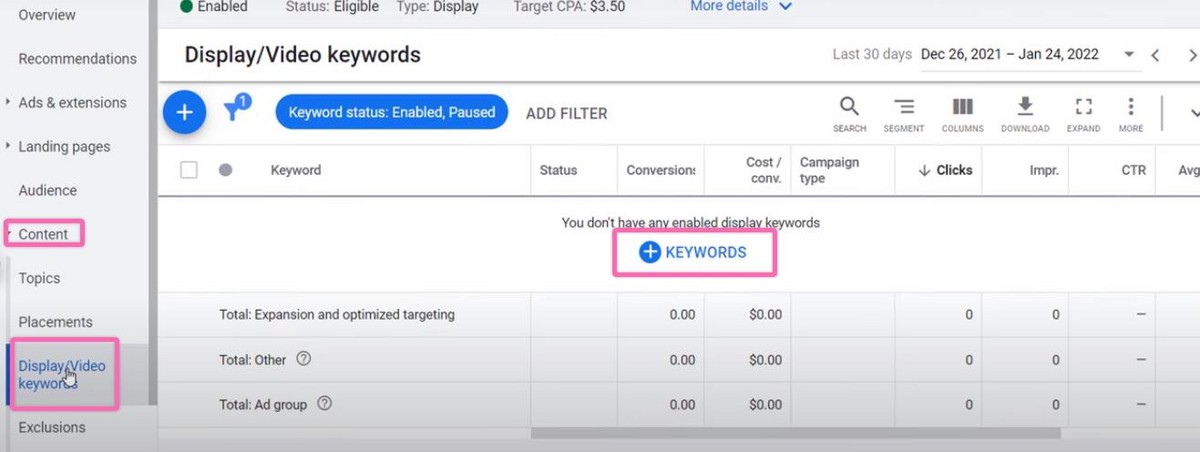
- To add negative keywords to your video ads, go to “Content” > “Display/Video keywords, and click “+ KEYWORDS”.
-
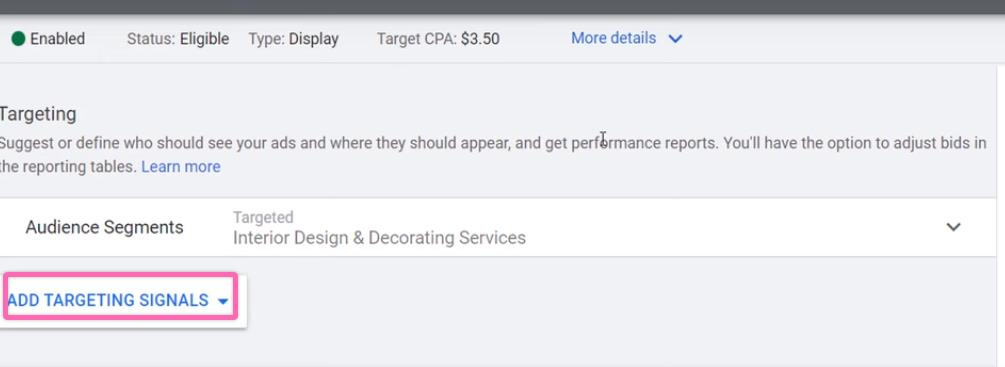
- Click “Edit all targeting” at the top.

-
- Click on the “Add targeting signal” drop-down menu.
-
- Select “Keywords”.
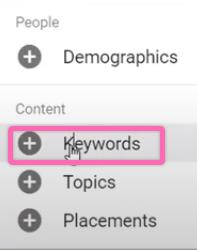
-
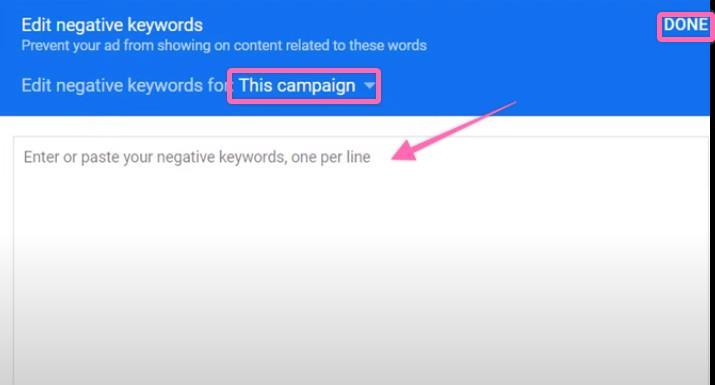
- Next, click “Negative keywords”.
-
- Choose either “This campaign” or “This Ad group” in the drop-down menu. Enter your negative keywords (one per line). Click “Done”.
Optimize your bids in Google Ads
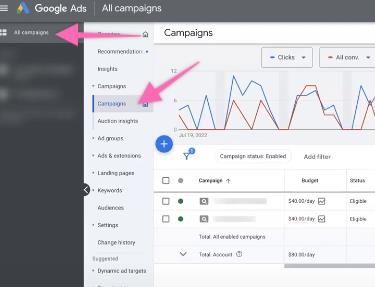
- Sign in to your Google Ads account here.
- Click “All campaigns”> “Campaigns”.
- Modify your column by clicking on the columns icon and clicking “Modify columns”.
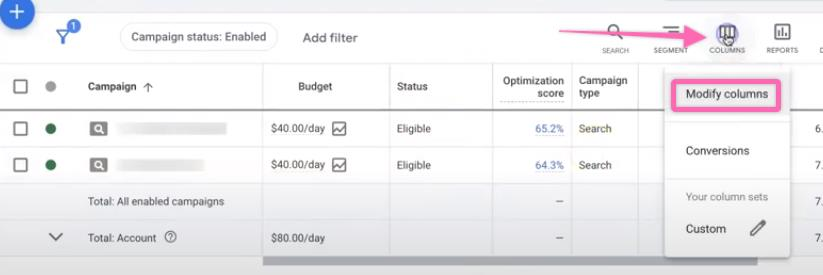
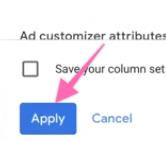
- Click “Budget” and “Apply” to proceed.

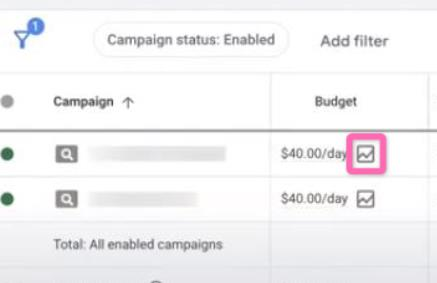
- Choose a campaign and click on the graph icon under “Budget”.
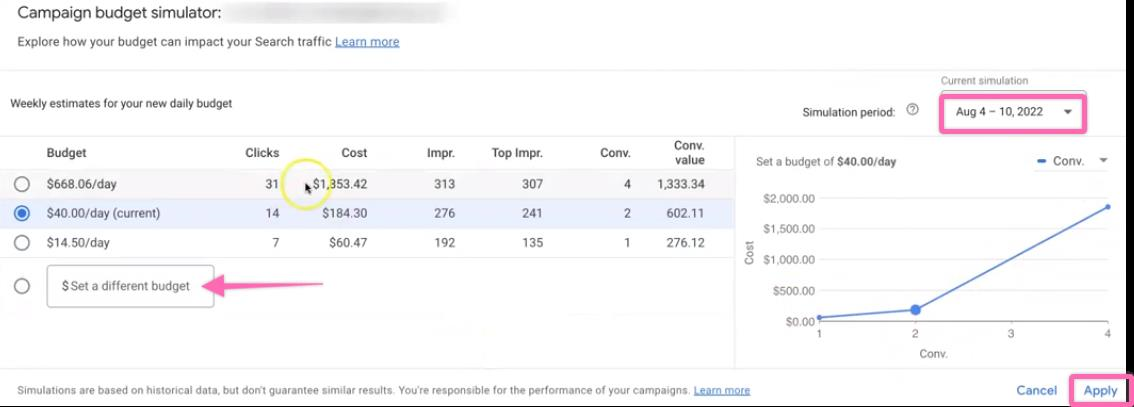
- The “Campaign budget simulator” predicts the performance outcome of a set budget. You may choose to “Set a different budget” and click on a date range or the “simulation period”. Once satisfied with the set budget and performance outcome according to the predicted graph, click “Apply”.
- Alternatively, you can adjust your bid by device, location, and custom ad scheduling.
-
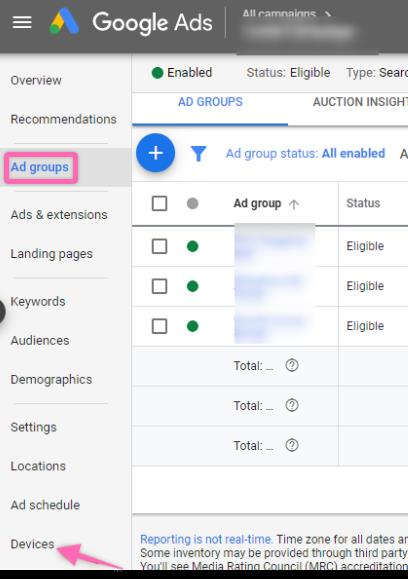
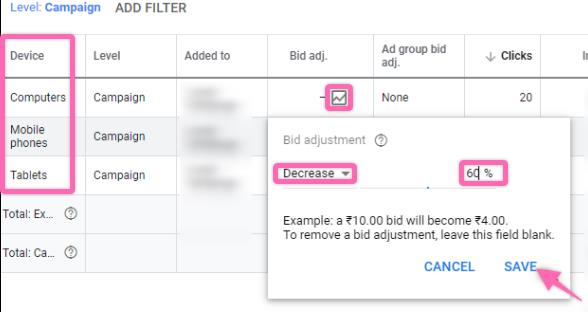
- Device bid adjustment: Go to your overview page and click “Devices”.
- Select a device and click the graph icon under “Bid adj”. A small pop-up will appear. Click on the drop-down menu to either increase or decrease the bid. Enter a percentage value and click “Save”.
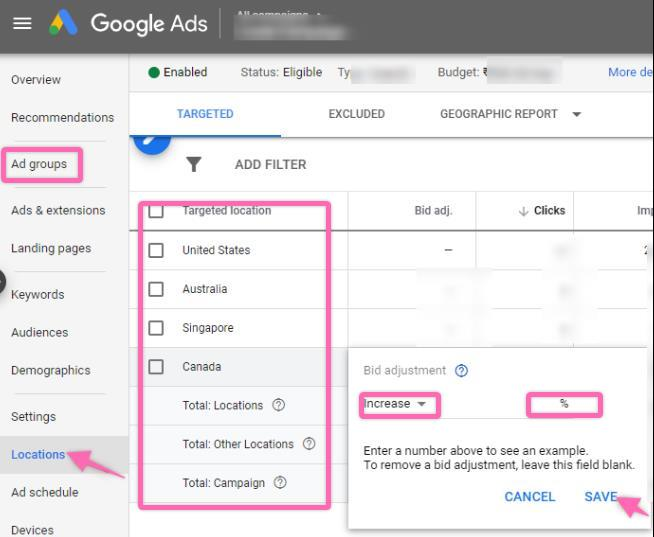
- Locations bid adjustments: Click “locations” and apply the same steps as mentioned above.
- Ad schedule bid adjustments: Click “Ad schedule” and add a schedule for your ads to run on a specific day and time. Click “Save” to proceed.
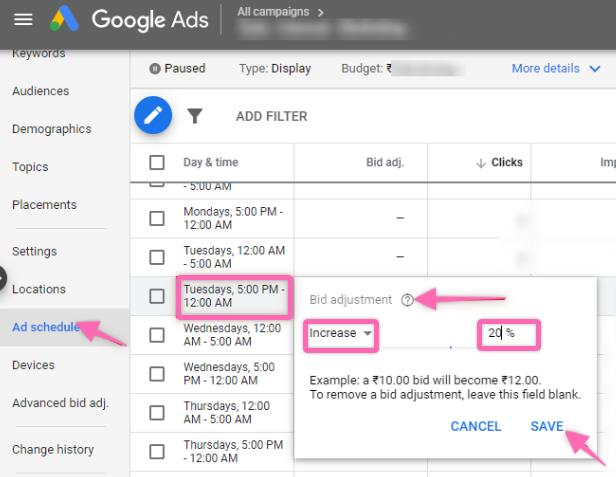

- Under Ad schedule, click on the preferred “day & time” to adjust your biddings following the same steps as “Device” and “Locations”. Remember to click “Save”.